 Draw Posts and Columns
Draw posts and columns for support and decorative purposes.
Contents
Paint and Materials
Rails Between
Draw Posts and Columns
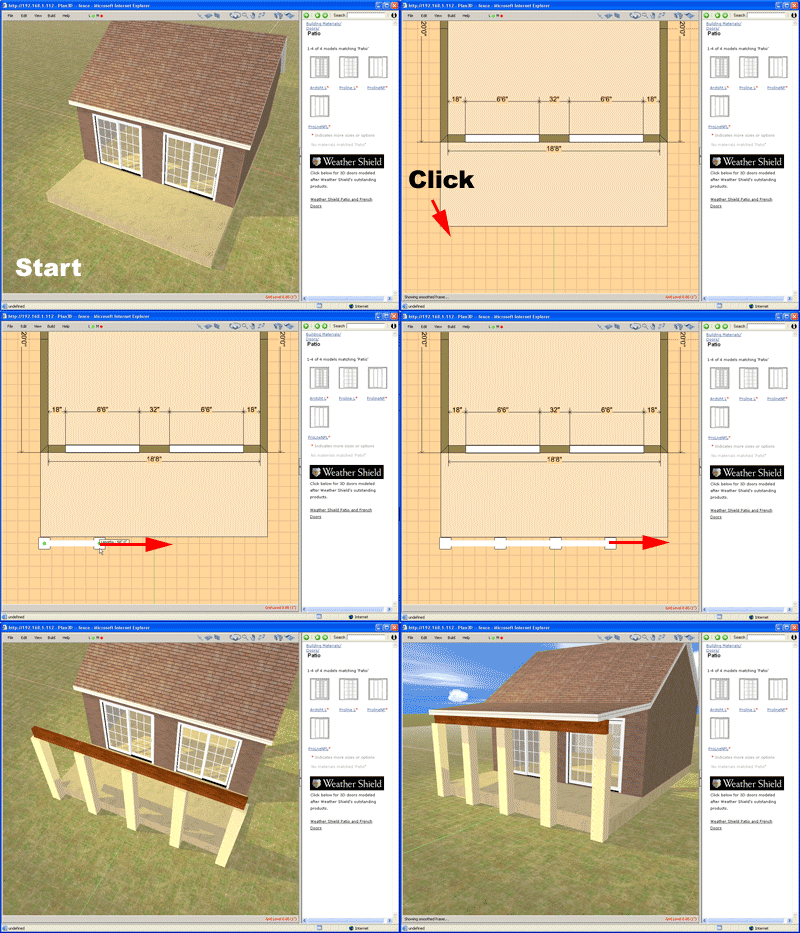
In this example we create four posts and add a porch roof:
Use the building wizard to create a 20 x 20 house. Add doors if desired.
Go to blueprint mode.
Add four posts using click-and-drag - 58 inches apart center to center.
Select a post and drag the green handle up to 8 feet high at beam top.
Choose Build> Construct Roof (custom).
In a circular direction, click the far right green handle, the right red, left red and right green to add a porch roof.
Example:

Draw a Single Post or Column
To draw a single post or column, choose Build>Draw Posts and Columns and click once and release where you want the post or column to appear.
Select
Select posts and columns by clicking them with the arrow tool or double-clicking it if you're in another mode. You'll see handles when the posts are selected.
Drawing Level
Posts and Columns on the current grid level or on top of the object you click-and-drag on - whichever is higher. See Edit> Move Work Grid for more information about changing levels.
Delete
Select the posts or columns and press the Delete or Backspace keys. You may also right-click it and choose Delete from the pop-up menu.
Note: When deleting posts and columns, all connected sections will be deleted.
Move
Click and drag a post to move it independently from the rest. Hold in the shift key to drag posts and columns without snapping.
Drag blue handles to move segments.
Height
Green handles adjust height. If there is a beam it will show both the post height and the height to the top of the beam.
Hide
Right-click and choose "Hide" from the pop up
menu to hide the entire string of connected posts or columns.
Right-click and choose "Hide Beam" to hide the beam. Right-click and choose "Hide Rails" to hide fences or rails that were added and appear between posts.
Hide All Fences and Rails with View> Hide> Fences and Posts. Show Fences and Rails with View>Show All or View>Show Last Hidden.
Lock
To lock or unlock a post so you can't accidentally change it, right-click and choose "Lock."
Beams
When you draw more then one post or column a beam is automatically added to the top. Change the beams size by right-clicking it and choosing "Properties" and entering it's dimensions. You may also adjust beam overhang here.
Hide a beam by right-clicking it and choose "Hide Beam."
To create log and other shaped beams see Build>Draw Molding.
Size and Style
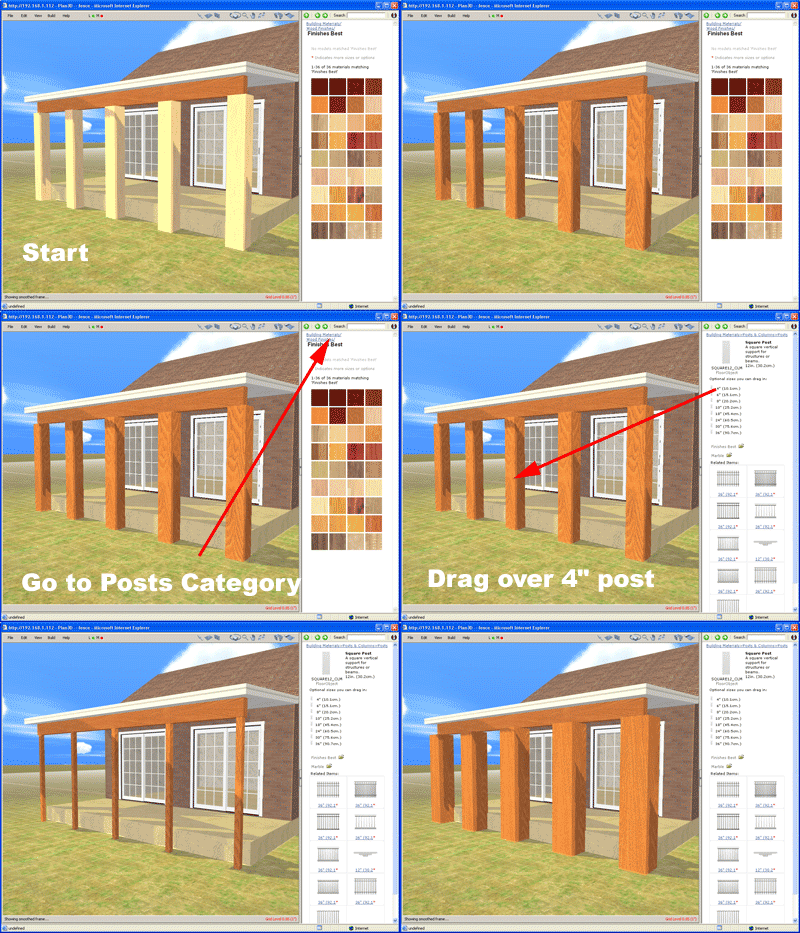
You can change the size of the post, or to change posts to columns or columns to posts, go to the Posts and Columns directory, choose the size and style you want, and drag them onto the posts or columns in your plan.
Example:

Convert a Post to a Column
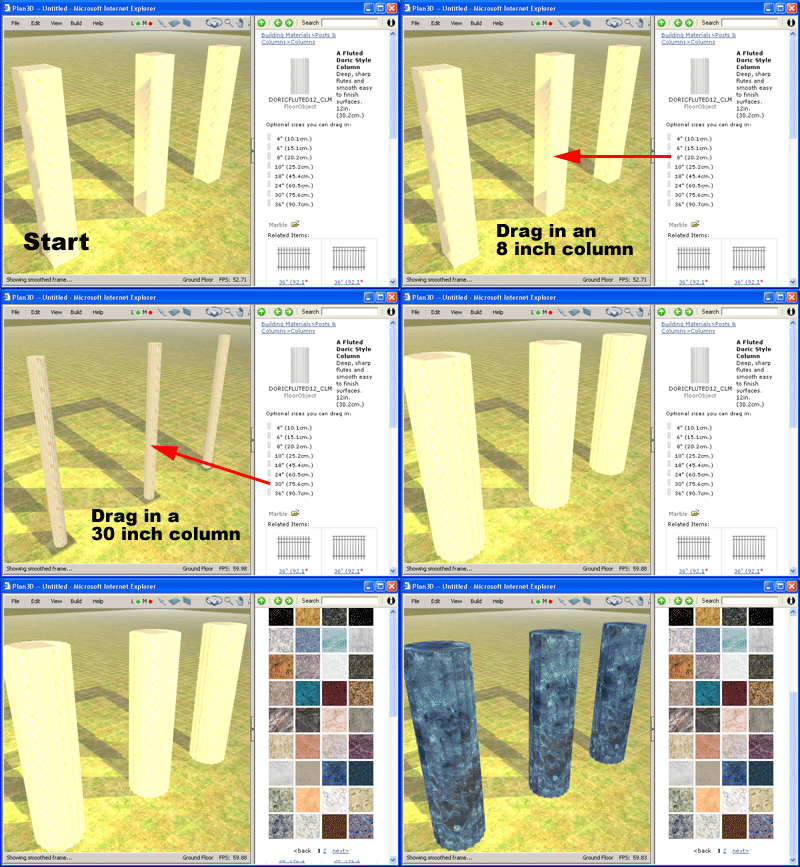
You can change posts to columns or columns to posts by dragging in different styles from the Posts and Columns category in the Directory.
Example:

Paint and Materials
Paint posts and columns or apply materials to them - like wood finishes and marble from the Directory. See Paint and Colors and Materials and Textures for more information.
Rails Between Posts and Columns
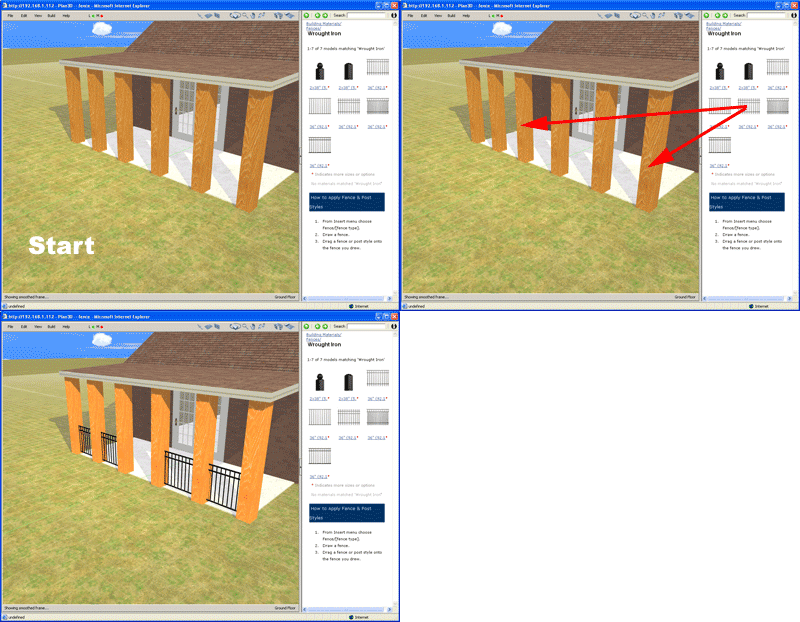
Drag the fence or rail style from the Directory you want onto connected posts or columns to see them. This doesn't work with single posts or columns, of course. To hide or show in-between fences or rails, right-click a column or post and choose "Hide Rails."
In the example below, the three posts on the left were drawn independently from the three posts drawn on the right - so the rails wouldn't appear in the center.
Example:
