 Use Your Own Material Files
This section describes how to apply your own images to surfaces. To learn about modifying materials after you put them on surfaces read Materials and Textures.
Contents
What is a Texture/Material File?
Materials are digital images you apply to furniture, wall, floor and other surfaces. For example, fabrics on furniture and wood finishes on cabinets. Materials are also referred to as textures.
Plan3D accepts materials in a variety of popular formats:
|
JPG |
A compressed bitmap image file |
|
GIF |
A bitmap file limited to 256 colors |
|
BMP |
An uncompressed standard bitmap file |
|
PNG |
A compressed bitmap file that is becoming popular |
Material images can be edited in programs like Photoshop© and other programs. To learn about modifying materials after you apply them to surfaces read this chapter in this manual: Materials and Textures.
Use Your Own Images
You are free to use your own images as surface materials. You can get images from a variety of sources, like web pages, clip art CD's and so on:
|
Image |
Drag-and-drop JPG, GIF, BMP and PNG file icons from your desktop or folders directly onto surfaces in plan3D.
To do this, shrink the plan3D window so you can see the file icon on your desktop, then drag it onto the surface in your plan3D project. If the image file will not drag in, you may need to remove illegal characters like &, * or % from the file name:
| |
|
|
||
|
Web Page Images |
Drag images from web pages directly onto surfaces in plan3D. You may need to resize the plan3D and web page windows to do this.
If the web image will not drag in because it is linked or has illegal characters like &, * or % in the URL, do this:
| |
|
Also see Optimizing Image Quality below. To lean about modifying materials after you put them on surfaces read Materials and Textures.
|
||
Adjusting Your Images
It is almost guaranteed your images will not be the right size or in the right position when you drag them in. To learn about modifying materials after you put them on surfaces read Materials and Textures..
Optimizing Image Quality
Here are some notes about improving the quality of images you use in plan3D:
Materials are repeated like floor tiles when applied to a surface. Seamless images look best if your surface is tiled. If an image only repeats once, a painting in a picture frame for example, then tiling isn't important.
Seamless images repeat without seeing the seam between them. Square images with power of two pixel dimensions work best.
|
*Powers of two
are 2, 4, 8, 16, 32, 64, 128, 256, 512... Most plan3D materials are 256
x 256 or 512 x 512 pixels. However, images can be any power of two up
to 1024 x 1024. Avoid large materials as they take up excessive amounts
of memory. Plan3D uses openGL to render 3D images which works best with
power of two. |
 Power
of two images, like the 64
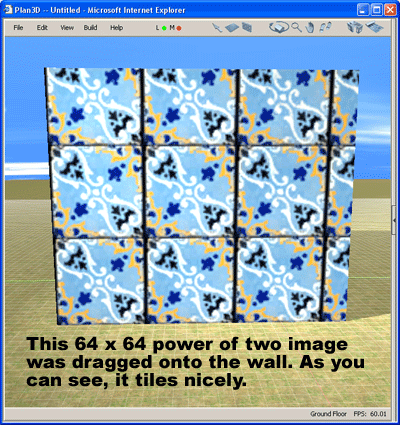
x 64 pixel image on the right, will tile correctly when dropped onto surfaces
in plan3D.
Example of a power of two image dropped into plan3D:

 Non-power
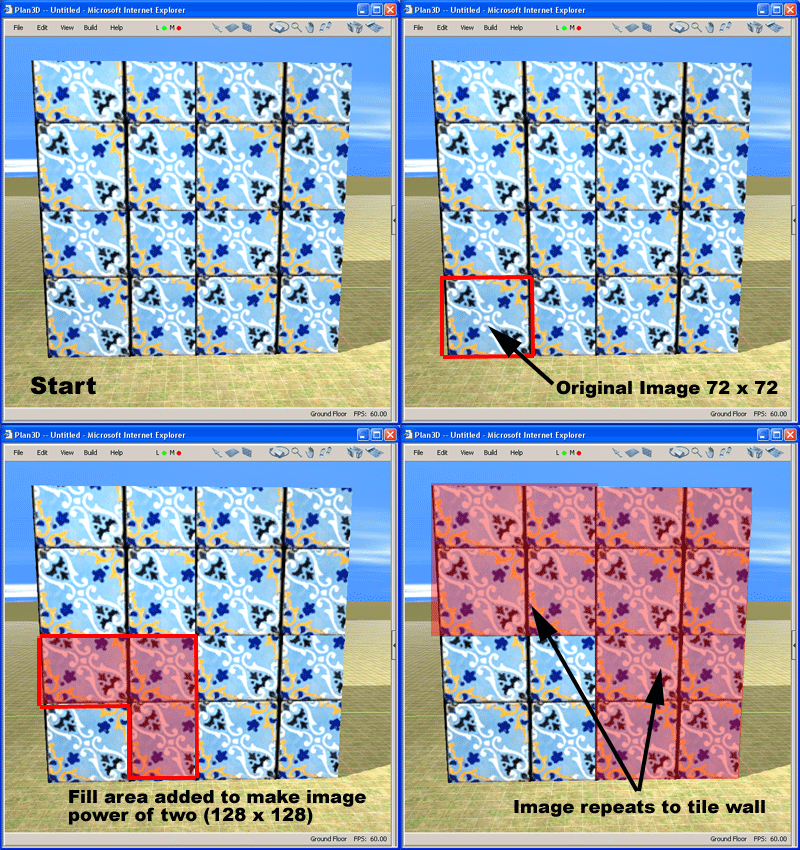
of two images, like the 72 x 72 image on the right, will be converted
to power of two - 128 x 128 in this case. (Images are not scaled.) The
extra space between 72 and 128 is filled with partial repeats of the image
so you don't get white banding - however, this only works well with some
images.
To make the image above tile correctly when dragged into plan3D, open it in a paint program and scale it to be a 64 x 64 pixel image or a 128 x 128 pixel image. Both of which are powers of two.
Example of a non-power of two image dropped into plan3D:

To learn about modifying materials after you put them on surfaces read Materials and Textures.