 Building Basics
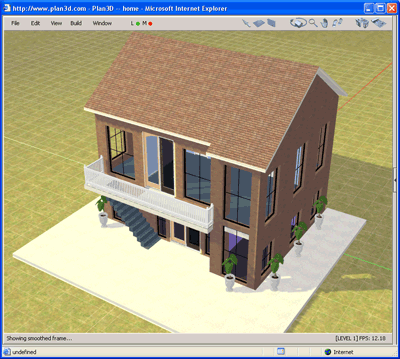
This page describes how to create a building. Follow the steps below to construct a house, office building, retail store, church, fast-food restaurant, bank, etc.
Note: If all you want to do is design a room, see Room Basics.
Contents
3. Add Floors
5. Draw Holes
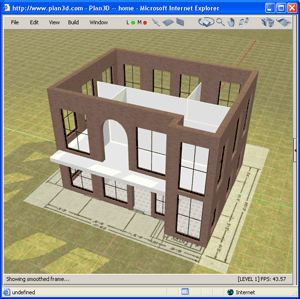
6. Add Windows
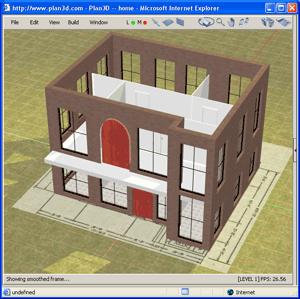
7. Add Doors
9. Add Wall Materials and Paint
10. Add Stairs
11. Add Roof
12. Add Fireplaces and Chimneys
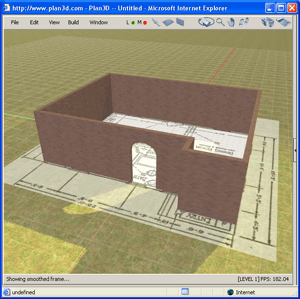
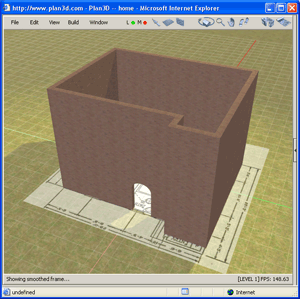
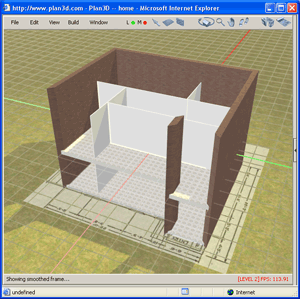
1. Create Exterior Walls
Basic structures are defined by exterior walls. There are several ways to make these:
Use the Building Wizard: In most cases you can create a building's basic structure in a few seconds by choosing "Building Wizard" from the File menu.
Draw Walls Freehand: Draw walls freehand to make any size or shaped building. Useful for sketching ideas.
Trace Imported Floor Plans: Import a floor plan and trace it.
Adjust Wall Height
Adjust wall heights with
either the blue handle on top or right-click walls and choose "Set
Dimensions..."
Note: The default wall height is set under Preferences>Walls
in the Edit menu.
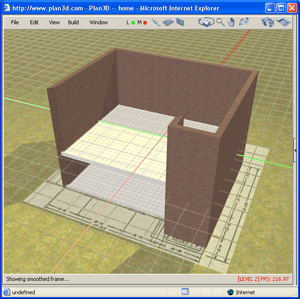
Add Floors
Read the How To Draw Floors tutorial if you're not familiar with floors.
Draw Floors on Different Floor Levels by first choosing "Set Floor Level" in the Edit menu and then drawing the floor on the grid level.
Set Floors to In-between levels drawing a floor and dragging it's middle handle up or down in 3D mode. This is useful for split level plans, landings, lofts and so on. Be sure to draw the floor in an area without another floor.
Add Interior Walls
Choose Interior from the Build>Walls menu and draw interior walls inside your building in 3D Perspective or blueprint views. To draw interior walls on the second level press the 2 key or the pageUp key to move the grid to that level.
Turn off wall linking by right-clicking walls and choosing "Disable Linking." Use "Tape measure" or "Dimension" from the Build menu to measure distances.
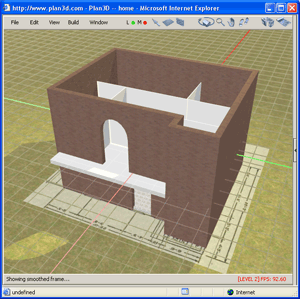
Draw Holes
Choose Hole from the Build menu and draw holes in walls, floors or roofs.
Arches: Right click on the top blue handle and choose "Make Edge Rounded" to create arches. Stair holes may also be drawn in floors.
Read the Add Windows tutorials to see how to drag in windows from the Directory or draw windows to exact size.
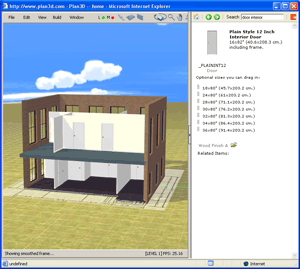
Drag in doors from the directory or choose Doors (custom) from the Build menu and draw them on walls (more about doors). Insert walls in blueprint or 3D views.
Reverse doors
or face other side by right-clicking
the door and choosing the appropriate menu item from the pop-up menu.
Doors are placed at grid level: Move
grid to different levels with number keys 1-9 or pageUp and pageDown keys.
Add Floor Coverings
If most of the floor is
covered with carpet then drop carpet onto it (more
about materials).
Choose Material from the Build menu and draw sub flooring on the bathroom
floor area and drag tile or linoleum onto it. Do the same with other floor
areas.
Add Wall Materials and Paint
If most of a wall is covered
with plaster then drop plaster onto it. Apply materials to exterior and
interior walls and the inside of holes and wall tops (more
about materials).
Choose Material from the Build menu and draw sub wall coverings onto shared
walls in rooms, and other areas. Do the same with other walls that are
different then shared walls. This
could be used to add wallpaper to the top of walls or wainscotting materials
to the bottom part of a wall.
Choose "Paint" from the Build menu and drag colors onto walls. Colors mix with materials so use light or white materials.

Add Stairs
a. Cut a hole in the second floor and draw a stairs up to it. Double-click stairs to see handles you can use to resize it, rotate it and adjust height - it will snap to the second floor automatically.
b. Right-click
and choose properties to modify stairs.
b. Set the grid level with pageUp, pageDown or number keys so stairs draw
on the correct level.

Add Roof
(Skip this step if you used the Wizard.)
Choose Roof from the Build menu and draw a roof on the top of a wall. If the roof is drawing the wrong way then undo and draw the roof in the opposite direction.
Edit a roof in wire-frame
mode by double-clicking it and adjusting handles. Click it again or click
away to make it solid again. You can edit in both solid and wire-frame
modes.
Add skylights and dormers at this time also.

Add Fireplaces and Chimneys
Drag fireplaces onto walls.
To create a chimney for the fireplace, draw walls on outside of wall where
fireplace protrudes.
Corner Fireplace: Draw a wall in a corner at a 45 degree angle -
put fireplace on it the wall and create walls for a chimney.
Finish Designing and Experimenting
Use the floor tool to add a porch to the outside. Add columns from the Build menu. Draw a roof over the porch if needed. You can also add furniture, cabinets, landscaping and more at this point.
Read the other tutorials for more information.